Overview
When you write a wrangle that you just love and want to share it with the world (or your future self), why go through all the hassle of opening Firefox, navigating to your Gists page, logging in to GitHub, copying and pasting the code (gasp!), and pressing the Create Gist button? Never mind choosing a filename, setting the syntax highlighting, and coming up with a description for it! Did you see all those words with -ing at the end? That’s all stuff you have to do! What if you could just have one button that does all that stuff for you? You could potentially save valuable seconds of your life…
That’s where [Wrangle to Gist]({{ site.socials.github }}/{{ page.repo }}) comes in. It’s a simple script that gets added to any parameter in Houdini that deals with snippets (chunks of code), and allows you to quickly post that snippet straight to your [Gist Feed]({{ site.socials.gist }}). View the rest of the features below.
Installation
Houdini Packages
Download the latest release here.
- Optionally, you can clone this repo if you’d like instead.
Navigate to your houdini user preferences folder and into the
packagesdirectory (if thepackagesfolder does not exist, create it).1$HOUDINI_USER_PREF_DIR/packagesCopy the zip archive here and extract its contents.
Move (or copy) the
wranglegist.jsonfile to the parent directory$HOUDINI_USER_PREF_DIR/packages. Yourpackagesfolder should now look something like this: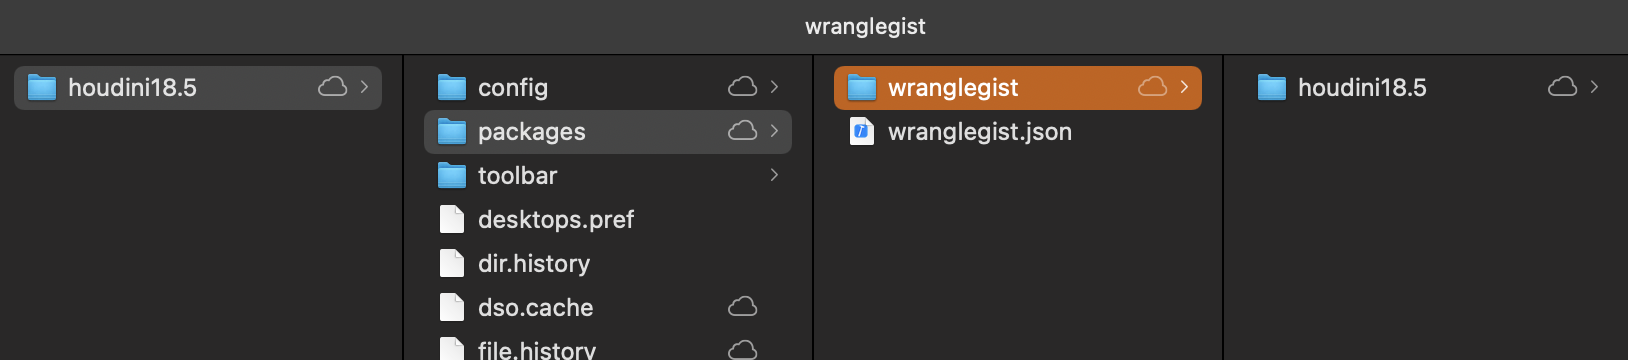
Packages folder
Launch Houdini
Manual Installation
If you prefer not to use Houdini packages for whatever reason, you can manually copy the files to any Houdini location ($HSITE, $HOUDINI_USER_PREF_DIR) or anywhere on your $HOUDINI_PATH.
ParmMenu.xmlshould live at the root. ie if you’re moving these files into your user prefs folder, it should live right inside thehoudini18.5folder.- Copy the module
wranglegist.pytopython2.7libsorpython3.7libs(depending on your Houdini installation version)
Setup
1. Create a Personal Access Token
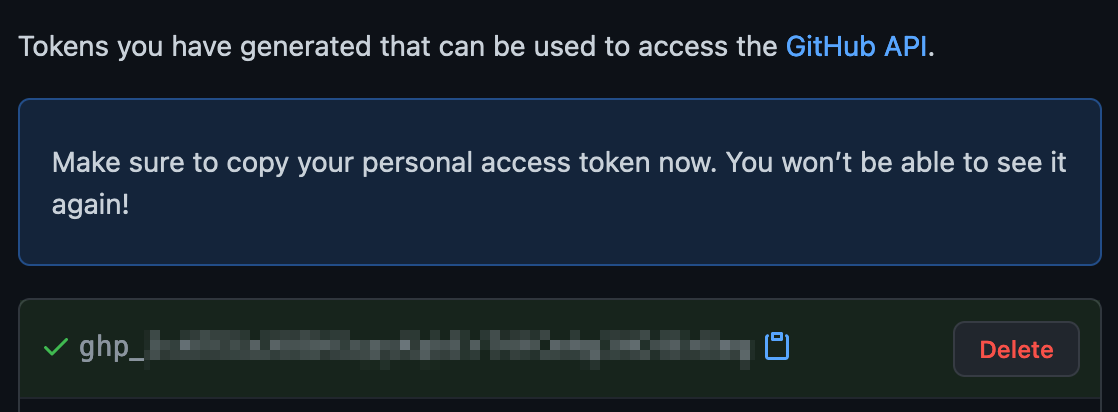
Personal Access Token
In order to push gists to your GitHub account, you need to create a personal token to use. It is pretty straightforward, and well-explained on GitHub’s page here.
For the Scopes section, you can just select gists.
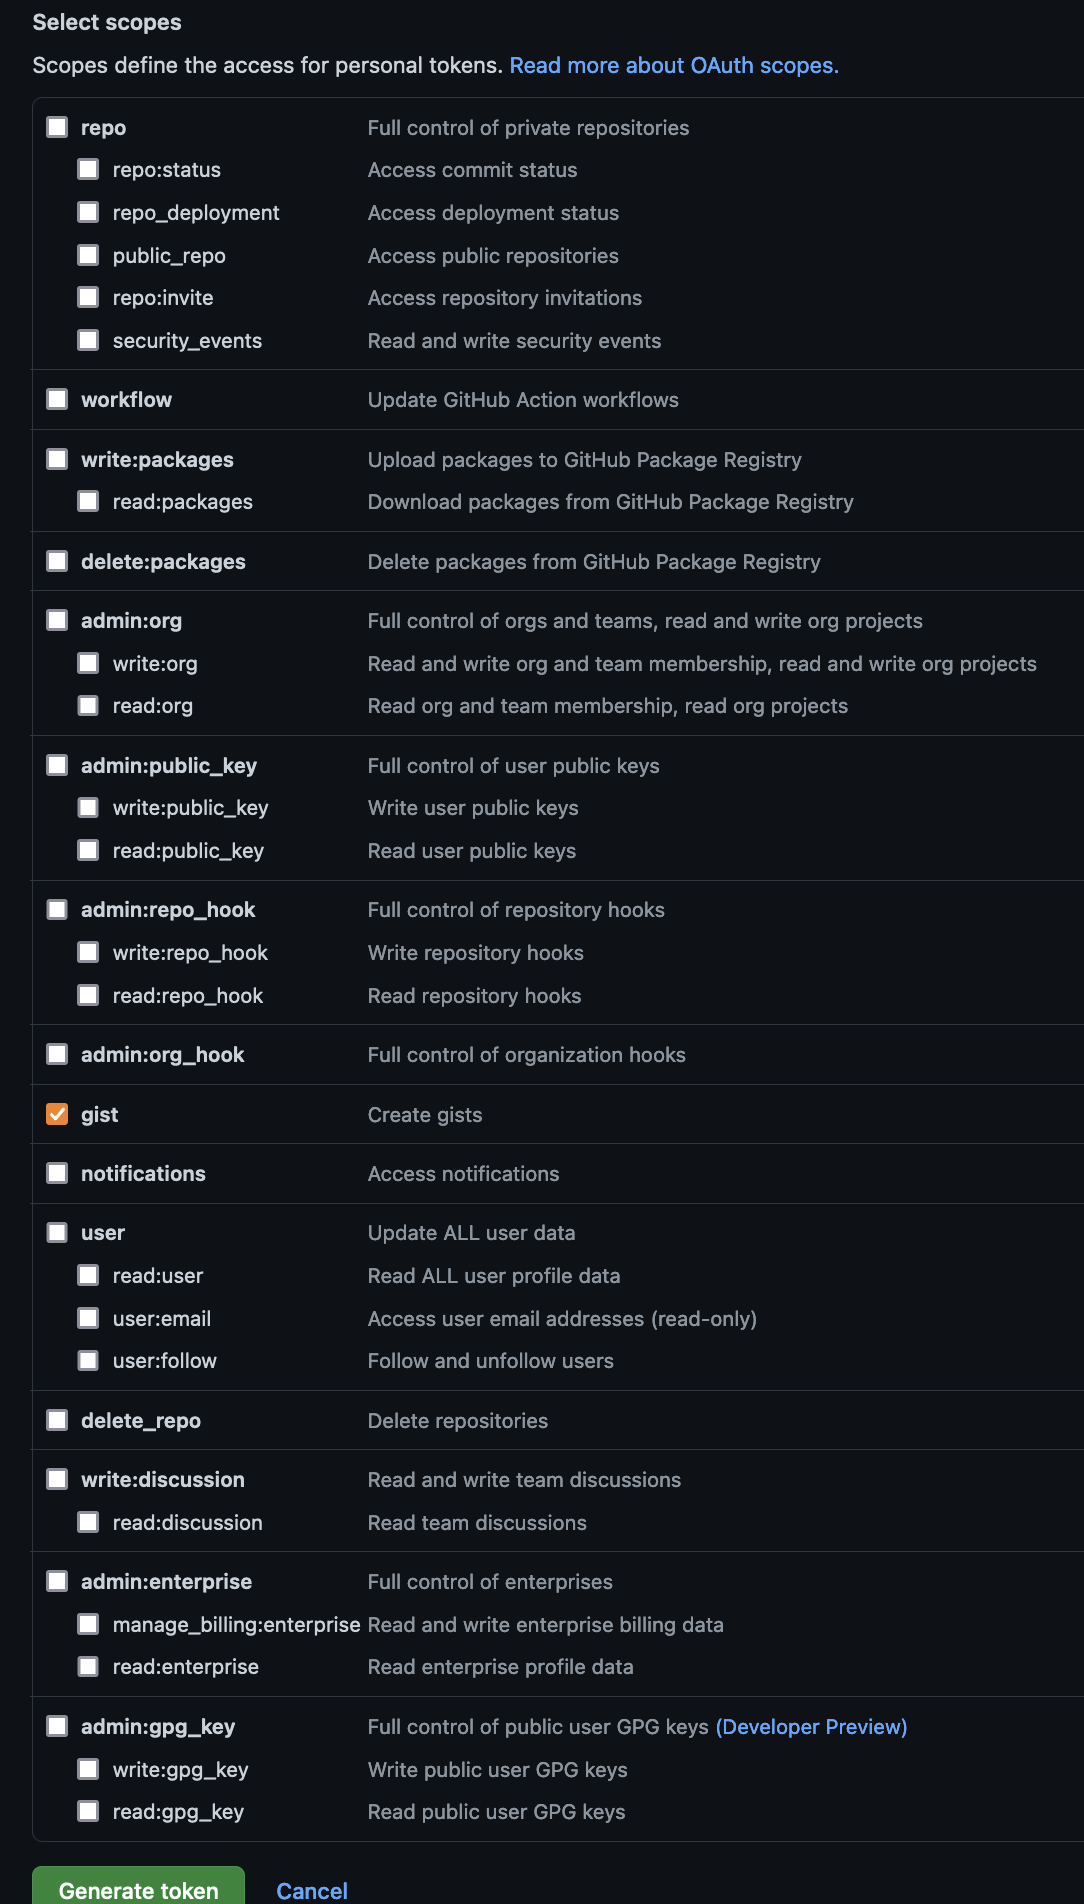
Scopes
2. Where to put the token
This tool will look for your personal access token inside your home folder.
Linux / Mac
| |
| |
- Create an empty file in your home folder and call it
gist_personal_access_token - On the first line, put your GitHub Username. For me, this would be
jamesrobinsonvfx - On the second line, paste in the token that github created for you in the
previous step. Your
~/gist_personal_access_tokenfile should now look like the following:1 2jamesrobinsonvfx ghp_eeGRRdh7ESHGdfke3GJKEoC46rDmg
And that’s it!
Don’t share your access token with anyone! This one is some gibberish, but close to what one would actually look like.
Features
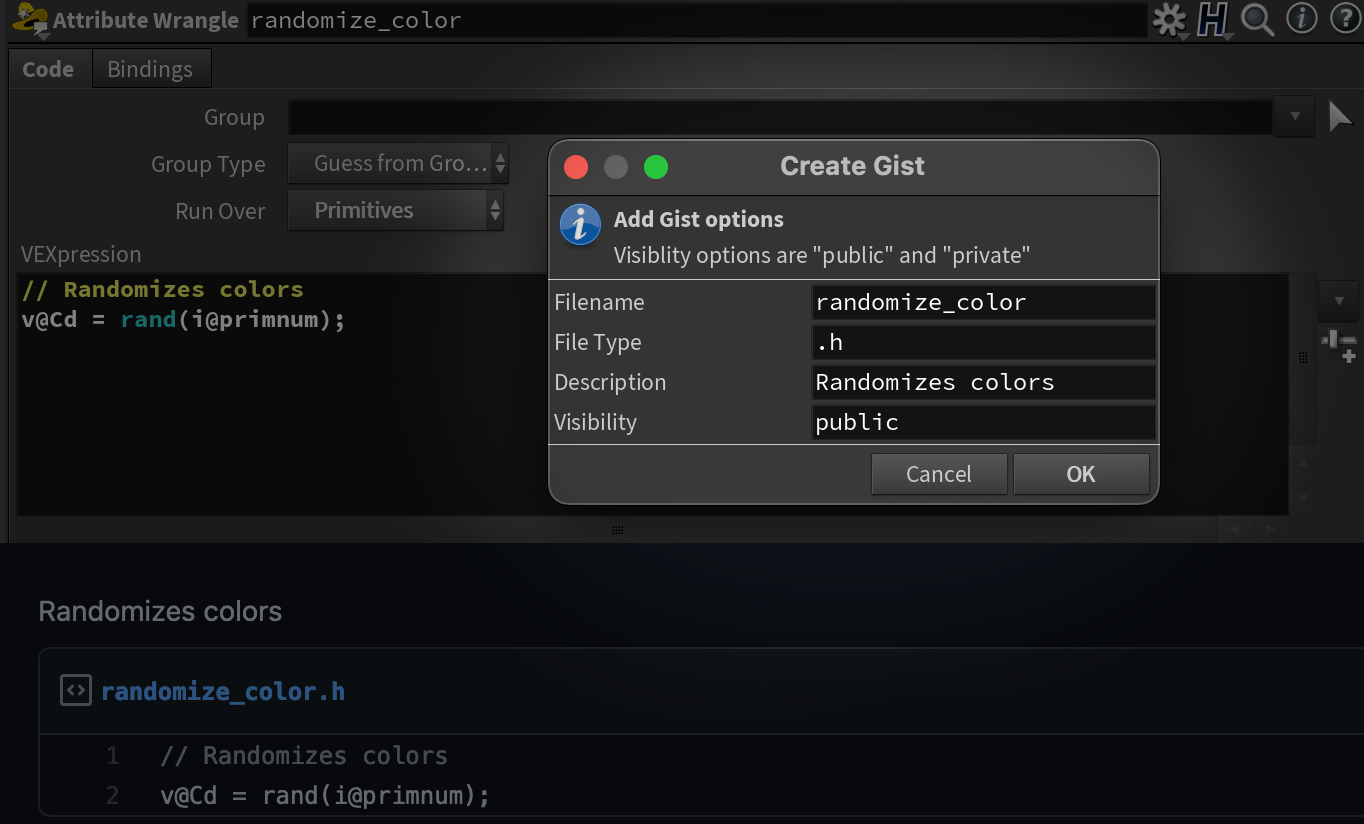
This menu item does one thing: push the snippet to your Gists feed! There are a couple extra features to note:
Suggested filename will come from whatever the node is called (
opname(".")), unless the node name is the default one from Houdini (ie.pointwrangle).Description field is left blank, unless your snippet’s first line is a comment (
//or/*for C-style languages,#or"""or'''for Python)You can choose from a few supported extensions:
| |
Please note that
.vflextensions aren’t recognized by GitHub/Gist, so the format highlighting won’t be there. That’s why for Vex wrangles I typically use.hto get some nice color variation. It’s close.
Context
Any parameter named snippet, code or python will have this option in its Right Click menu.
Usage
Example usage